 Chef Yous
Hello, fellow food lovers! Cristina here from Kefir Cooking, and I’m so excited to share one of my absolute favorite baking secrets with you today: no-knead kefir bread. This isn’t just a recipe; it’s an invitation to experience the joy of homemade bread with minimal effort and maximum flavor.
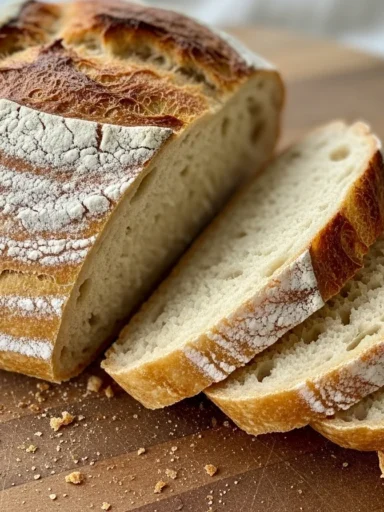
I know, traditional bread making can seem daunting, but with this method, we’re going to demystify it together, creating delicious, gut-friendly loaves that will fill your home with an irresistible aroma. Imagine biting into a perfectly crusty, chewy slice of healthy artisan bread, knowing you made it yourself with ease! That’s the wonder of no-knead kefir bread.
What is No-Knead Kefir Bread and Why is it So Popular?
No-knead kefir bread is exactly what it sounds like: a fantastic loaf of bread that requires no intensive kneading, thanks to a long, slow fermentation process. Instead of vigorous mixing, time does all the work, developing gluten and flavor while you go about your day. The secret ingredient, of course, is kefir – a fermented dairy product packed with beneficial probiotics. This isn’t just about convenience; it’s about creating something truly special and nourishing, making no-knead kefir bread a standout in the world of homemade baking.
This method has surged in popularity because it makes baking accessible to everyone, regardless of their experience level. It’s a wonderful sourdough alternative for those looking for fermented dough recipes without the commitment of maintaining a sourdough starter. The kefir starter bread brings a unique tang and incredible depth of flavor that’s both complex and utterly delightful. Plus, the probiotic bread benefits are a huge draw for anyone looking to incorporate more gut-friendly foods into their diet. Everyone loves the simplicity and the delicious results of no-knead kefir bread.
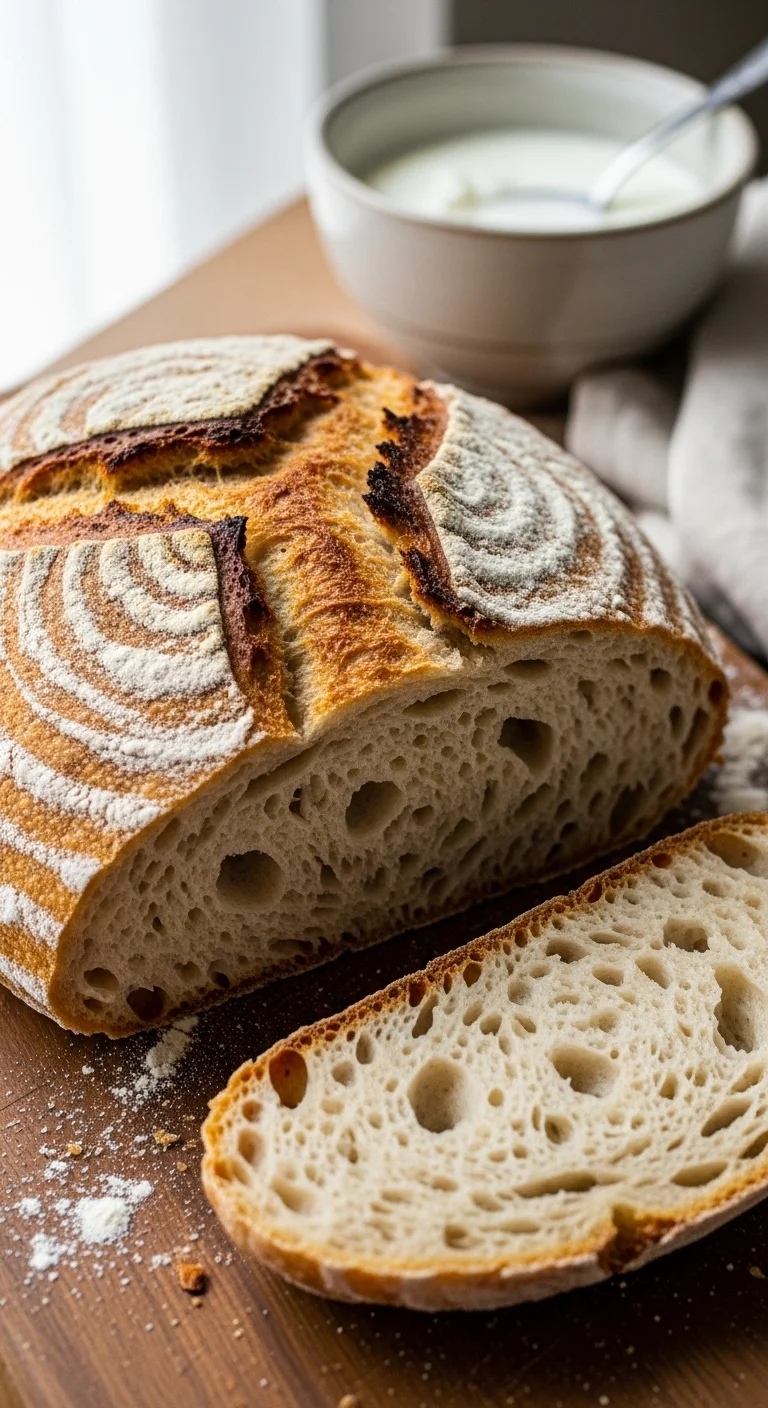
As a passionate advocate for healthy eating, I truly believe in the power of fermented foods. This approach to no-knead kefir bread not only simplifies the process but also enhances the nutritional profile. It’s a win-win, allowing us to enjoy truly easy homemade bread that’s bursting with flavor and good-for-you qualities. The texture is often rustic and beautiful, resembling a professional artisan loaf, which adds to its charm and popularity. There’s a certain magic in watching simple ingredients transform into something so magnificent with minimal intervention, and that’s precisely what you get with no-knead kefir bread.
What Essential Ingredients and Equipment Do You Need for No-Knead Kefir Bread?
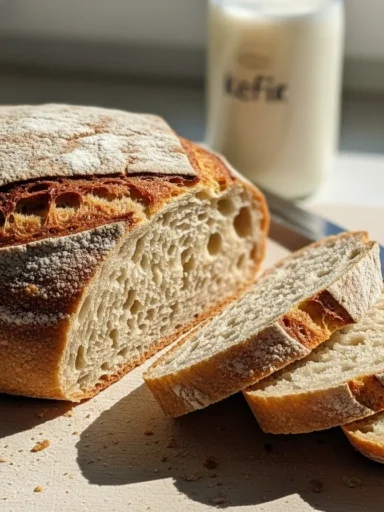
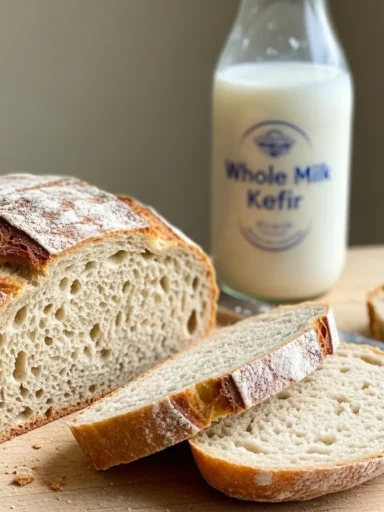
Gathering your ingredients for no-knead kefir bread is wonderfully straightforward. You’ll need all-purpose or bread flour, good quality salt, water, and, of course, your star ingredient: kefir. I recommend using whole milk kefir for the best results, as its richness contributes to a tender crumb and a beautiful crust.
Some recipes might call for a tiny pinch of yeast to give the kefir a little boost, especially if your kefir is very mild, but often the natural yeasts and bacteria in the kefir are enough. This simple combination is all it takes to create a magnificent no-knead kefir bread.
For equipment, you don’t need anything fancy, which is another reason I adore making no-knead kefir bread. A large mixing bowl is essential for combining your ingredients and allowing the dough to ferment. You’ll also need a sturdy spoon or spatula for mixing. The real game-changer for achieving that perfect crust is a Dutch oven or a heavy-bottomed pot with a lid that can go into the oven.
This creates a steamy environment that mimics a professional baker’s oven, giving your no-knead kefir bread an incredible texture. A kitchen scale for precise measurements is also a wonderful tool to have, ensuring consistent results every time you bake no-knead kefir bread.
“The beauty of no-knead bread is its simplicity. It’s a testament to how time and natural processes can do the heavy lifting, delivering incredible flavor with minimal effort.” This quote perfectly encapsulates why no-knead kefir bread is so beloved. You’re not just baking; you’re letting nature’s magic unfold in your kitchen. Having the right tools, even if they are basic, makes all the difference in ensuring your no-knead kefir bread turns out perfectly every time. With these essentials, you’re well on your way to enjoying delicious, easy homemade bread.
How Do You Master the Simple Steps to Bake Perfect No-Knead Kefir Bread?
Mastering no-knead kefir bread is all about understanding a few key steps and having a little patience. First, in your large mixing bowl, combine your flour, salt, and yeast (if using). Then, pour in your water and kefir. Mix everything together with a spoon until just combined; it will be a shaggy, sticky dough. Don’t overmix! The less you handle it at this stage, the better. This initial mix is crucial for developing the structure of your no-knead kefir bread.
Next comes the fermentation, the true heart of no-knead kefir bread. Cover your bowl with plastic wrap or a damp towel and let it rest at room temperature for 12-18 hours. During this long proof, the kefir works its magic, breaking down starches and developing complex flavors, creating that wonderful gut-friendly bread we love. You’ll notice bubbles forming, indicating that the dough is actively fermenting. This slow process is key to the distinctive taste and texture of no-knead kefir bread, transforming simple ingredients into something extraordinary.
Once the dough has fermented, gently scrape it out onto a lightly floured surface. Resist the urge to knead it! Instead, gently fold the edges of the dough towards the center a few times to create a loose ball. This gentle shaping helps build tension for a good rise. Let it rest for another 30-60 minutes while your Dutch oven preheats in the oven at a high temperature (usually around 450-500°F or 230-260°C). This preheating step is vital for achieving a crisp crust on your no-knead kefir bread.
Carefully transfer the dough to the hot Dutch oven, cover it, and bake for about 30 minutes. The steam trapped inside will help your no-knead kefir bread achieve a beautiful rise and a tender crumb. Then, remove the lid and bake for another 15-20 minutes until the crust is golden brown and crispy. Let your beautiful no-knead kefir bread cool completely on a wire rack before slicing. This cooling period is essential for the crumb to set and for the flavors to fully develop, ensuring every slice of your easy homemade bread is perfect.
What Are the Best Tips and Tricks for Troubleshooting No-Knead Kefir Bread?
Even with such a simple process, sometimes things don’t go exactly as planned. If your no-knead kefir bread isn’t rising much, check the age of your flour and the activity of your kefir. Older flour can be less active, and weak kefir won’t provide enough leavening. You might need to add a tiny pinch of active dry yeast next time to ensure a robust rise for your no-knead kefir bread. Also, ensure your kitchen isn’t too cold during the bulk fermentation; a warmer spot can encourage better activity.
If your no-knead kefir bread turns out too dense or gummy, it could be a sign of over-proofing or under-proofing. Over-proofed dough will collapse, while under-proofed dough won’t develop enough gas. The ideal fermentation time can vary based on your kitchen’s temperature and the strength of your kefir starter bread. Pay attention to the dough’s appearance – look for bubbles and a slight domed shape. A dense crumb can also result from slicing the no-knead kefir bread before it has fully cooled, so patience is key for the best texture.
Another common issue is a crust that isn’t crispy or a loaf that’s too pale. Make sure your Dutch oven is thoroughly preheated before adding the dough. A hot pot is crucial for that initial burst of steam and oven spring. Also, don’t be afraid to bake your no-knead kefir bread for the full recommended time, or even a few minutes longer, after removing the lid. A deep golden-brown crust indicates proper baking and will result in a superior texture. Adjusting your oven temperature slightly might also help achieve that perfect, crackly crust on your healthy artisan bread. Serious Eats offers great insights into the science behind no-knead baking.
How Can You Experiment with Delicious Variations of No-Knead Kefir Bread?
The beauty of no-knead kefir bread doesn’t stop at the basic recipe; it’s a fantastic canvas for creativity! Once you’ve mastered the classic loaf, you can start experimenting with different flours. Try substituting a portion of the all-purpose flour with whole wheat, rye, or spelt flour for a more robust flavor and a denser, chewier texture. These whole grains also add more fiber and nutrients, enhancing the gut-friendly bread aspect. Imagine a hearty rye no-knead kefir bread – absolutely delicious!
Incorporating mix-ins is another wonderful way to personalize your no-knead kefir bread. During the final shaping stage, gently fold in ingredients like toasted seeds (sesame, poppy, sunflower), dried fruits (cranberries, raisins), nuts (walnuts, pecans), or even savory elements like herbs (rosemary, thyme), olives, or sun-dried tomatoes. These additions not only add flavor and texture but also make each loaf a unique creation. A no-knead kefir bread with herbs and cheese would be a delightful accompaniment to any meal, transforming your easy homemade bread into something truly gourmet.
Don’t be afraid to play with different types of kefir or even other fermented liquids. While dairy kefir is traditional, some adventurous bakers might experiment with water kefir or even a small amount of active sourdough starter to create a hybrid kefir starter bread. This opens up a world of fermented dough recipes, allowing you to fine-tune the tanginess and crumb structure. Each variation of no-knead kefir bread offers a new adventure for your taste buds, making baking an exciting journey of discovery. Embrace the joy of creating healthy artisan bread that is uniquely yours!
Key Takeaways
- Effortless Baking: No-knead kefir bread requires minimal effort, relying on a long fermentation for flavor and texture.
- Gut-Friendly: Kefir adds beneficial probiotics, making this a delicious and healthy artisan bread option.
- Simple Ingredients: Basic flour, water, salt, and kefir are all you need for your no-knead kefir bread.
- Dutch Oven Magic: A preheated Dutch oven is essential for achieving a perfect crust and rise.
- Patience is Key: Allow ample time for fermentation and cooling to ensure the best results for your no-knead kefir bread.
- Endless Variations: Easily customize your no-knead kefir bread with different flours, seeds, herbs, or dried fruits.


No-Knead Kefir Bread
- Total Time: 18 hours 5 minutes
- Yield: 1 loaf 1x
- Diet: Vegetarian
Description
A simple and delicious no-knead bread made with kefir, perfect for baking at home with minimal effort.
Ingredients
- 3 cups all-purpose flour
- 1 teaspoon salt
- 1 cup water
- 1 cup whole milk kefir
- Optional: a pinch of active dry yeast
Instructions
- In a large mixing bowl, combine the flour, salt, and yeast (if using).
- Pour in the water and kefir, then mix until just combined to form a shaggy dough.
- Cover with plastic wrap and let it rest at room temperature for 12-18 hours.
- Once fermented, scrape the dough onto a lightly floured surface and fold the edges towards the center to form a loose ball.
- Let the dough rest for another 30-60 minutes while preheating your Dutch oven to 450°F (232°C).
- Transfer the dough to the hot Dutch oven, cover, and bake for 30 minutes.
- Remove the lid and bake for an additional 15-20 minutes until the crust is golden brown.
- Let the bread cool completely on a wire rack before slicing.
Notes
Experiment with different flours and add-ins like seeds or herbs for variations.
- Prep Time: 15 minutes
- Cook Time: 50 minutes
- Category: Bread
- Method: Baking
- Cuisine: American
Nutrition
- Serving Size: 1 slice
- Calories: 200
- Sugar: 1g
- Sodium: 200mg
- Fat: 2g
- Saturated Fat: 1g
- Unsaturated Fat: 1g
- Trans Fat: 0g
- Carbohydrates: 38g
- Fiber: 2g
- Protein: 7g
- Cholesterol: 5mg